Food
Master the Art of Making Homemade Soy Sauce
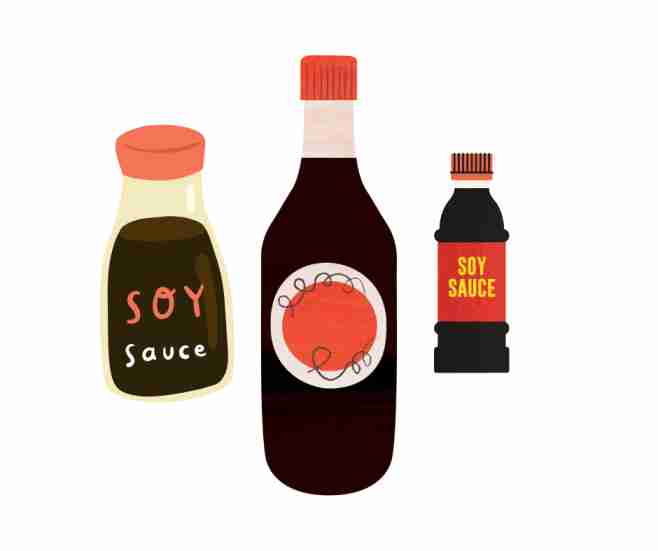
Soy sauce is a staple condiment in many Asian cuisines, known for its rich umami flavor and ability to enhance the taste of various dishes. While store-bought soy sauce is readily available, there’s something special about crafting your own homemade version. Not only does it allow you to customize the flavors to your liking, but it also lets you appreciate the art of traditional soy sauce making. In this article, we will guide you through the process of creating your very own homemade soy sauce.
Homemade Soy Sauce Preparation: Gathering the Ingredients and Equipment
Before embarking on your soy sauce-making journey, it’s essential to gather the necessary ingredients and equipment. Here’s what you’ll need:
- Soybeans: The primary ingredient that gives soy sauce its distinct flavor. Choose high-quality, organic soybeans for the best results.
- Wheat: Usually added in small quantities to the soybean mixture to aid in the fermentation process.
- Salt: An essential ingredient that helps preserve the soy sauce and adds to its savory taste.
- Water: Used for soaking the soybeans and diluting the sauce to achieve the desired consistency.
- Fermentation vessel: A large, airtight container that will hold the soybean mixture during the fermentation process.
- Cheese cloth: To strain the liquid and remove any solids or impurities.
Process 1: Preparing the Soybeans
- Soak the soybeans: Start by rinsing the soybeans thoroughly under running water. Then, place them in a large bowl and cover them with water. Allow the beans to soak overnight or for at least 12 hours. This step softens the beans and makes them easier to work with.
- Cooking the soybeans: After the soaking period, drain the water from the soybeans and transfer them to a large pot. Add fresh water and bring it to a boil. Reduce the heat and simmer the beans for approximately 2 to 3 hours or until they become tender.
- Mash the cooked soybeans: Once the soybeans are fully cooked, drain them and let them cool slightly. Mash the beans using a mortar and pestle or a food processor until you achieve a smooth, paste-like consistency.
Step 2: Fermentation Process
- Mixing the soybean paste: In a clean fermentation vessel, combine the mashed soybeans, wheat, and salt. Mix them thoroughly to ensure an even distribution of ingredients.
- Fermentation period: Seal the vessel tightly and store it in a cool, dark place with a consistent temperature between 20°C and 30°C (68°F to 86°F). Allow the mixture to ferment undisturbed for several months. During this time, the soybean mixture will undergo a transformation, resulting in the development of complex flavors.
- Monitoring the fermentation: Periodically check on the progress of the fermentation process. You may notice a thin layer of mold forming on the surface, which is normal. However, if you see any signs of discoloration or a foul odor, discard the mixture and start anew.
Step 3: Extracting the Soy Sauce
- Straining the mixture: After the fermentation period, line a large bowl with cheesecloth and carefully pour the fermented soybean mixture onto the cloth. Allow the liquid to strain naturally, collecting the soy sauce in the bowl while discarding any solids or impurities.
- Bottling and storage: Once the soy sauce has been strained, transfer it to sterilized glass bottles or jars. Store the bottles in a cool, dark place or refrigerate them to maintain freshness and extend the shelf life.
Homemade Soy Sauce Conclusion
Congratulations! You’ve successfully created your own homemade soy sauce, a testament to your culinary skills and appreciation for authentic flavors. Making soy sauce from scratch allows you to experience the art of fermentation and craft a condiment tailored to your taste preferences. The rich umami flavors and complex aromas of your homemade soy sauce will undoubtedly elevate your culinary creations.
Remember to label and date your bottles to keep track of the freshness and shelf life of your soy sauce. Stored properly, it can last for several months, providing you with a constant supply of this delightful condiment.
Experiment with different variations by adding herbs, spices, or even experimenting with different types of soybeans. With time and practice, you can master the art of soy sauce making and create unique flavor profiles that reflect your culinary style.
So why settle for store-bought soy sauce when you can immerse yourself in the satisfying process of making your own? Start your soy sauce-making adventure today and discover the joy of crafting a homemade condiment that will enhance your dishes and impress your taste buds.
Latest Post


When it comes to classic Italian cuisine, spaghetti sauce is a staple that everyone loves. Whether you’re a seasoned cook or a beginner in the kitchen, making your own spaghetti sauce from scratch can be a rewarding and flavorful experience. In this article, we will guide you through a simple and delicious recipe for homemade spaghetti sauce that will have your taste buds dancing.
Gathering the Ingredients
To start making your spaghetti sauce, gather the following ingredients:
- Tomatoes: You will need around 2 pounds of ripe tomatoes. Opt for fresh, juicy ones for the best flavor.
- Onion: Chop one medium-sized onion finely.
- Garlic: Mince 2-3 cloves of garlic for a delightful aroma.
- Olive Oil: Use 2 tablespoons of extra virgin olive oil to sauté the onion and garlic.
- Tomato Paste: Include 1 can (6 ounces) of tomato paste to enhance the tomato flavor.
- Herbs and Spices: Add 1 teaspoon of dried basil, 1 teaspoon of dried oregano, ½ teaspoon of sugar, and salt and pepper to taste.
- Optional Ingredients: If you prefer a meaty sauce, you can add cooked ground beef or Italian sausage.
Preparing the Sauce
Follow these simple steps to prepare your spaghetti sauce:
1. Step One: Preparing the Tomatoes
Start by blanching the tomatoes to make the peeling process easier. Bring a pot of water to a boil and gently place the tomatoes in for about 30 seconds. Then, transfer them to a bowl of ice water. The skins should now easily peel off. Remove the skins and roughly chop the tomatoes.
2. Step Two: Sautéing the Onion and Garlic
Heat the olive oil in a large saucepan over medium heat. Add the chopped onion and minced garlic, and sauté until they become soft and translucent, usually about 5 minutes.
3. Step Three: Adding the Tomatoes and Tomato Paste
Add the chopped tomatoes and tomato paste to the saucepan. Stir well to combine all the ingredients. Let the sauce simmer over low heat for about 30 minutes, allowing the flavors to meld together.
4. Step Four: Seasoning
Now it’s time to add the herbs and spices. Sprinkle in the dried basil, dried oregano, sugar, salt, and pepper. Stir everything together, and continue to simmer the sauce for an additional 10 minutes to let the flavors develop.
5. Step Five: Optional Meat
If you prefer a meaty sauce, this is the step to add your cooked ground beef or Italian sausage. Stir it into the sauce and let it simmer for an additional 10-15 minutes to allow the flavors to infuse.
6. Step Six: Final Touches
Taste the sauce and adjust the seasoning according to your preferences. If you find the sauce too thick, you can add a small amount of water to reach your desired consistency.
Serving and Storage
Congratulations! Your homemade spaghetti sauce is now ready to be enjoyed. Serve it over cooked spaghetti noodles, and garnish with fresh basil leaves and grated Parmesan cheese for an extra touch of flavor. This sauce also pairs well with other pasta shapes or can be used as a base for lasagna or pizza.
If you have any leftovers, let the sauce cool down and store it in an airtight container in the refrigerator for up to 3-4 days. You can also freeze it for longer storage, ensuring you have a tasty sauce ready for future meals.
In conclusion, making spaghetti sauce from scratch allows you to control the flavors and create a truly delicious dish. With a few simple ingredients and some love in the kitchen, you can enjoy a homemade sauce that will impress your family and friends. So, put on your apron and give this recipe a try – your taste buds will thank you!
Latest Post

Strawberries are delicious and nutritious fruits that are enjoyed by many. However, before you bite into these juicy delights, it’s important to ensure that they are properly cleaned. Cleaning strawberries not only helps remove any dirt or debris but also eliminates harmful bacteria, ensuring that you can enjoy them safely. In this guide, we will walk you through a step-by-step process to clean strawberries effectively.
How to Clean Strawberries
Follow these simple steps and enjoy your strawberries with peace of mind.
Step 1: Gather Your Supplies
Before you begin cleaning your strawberries, make sure you have the necessary supplies ready. You will need:
- Fresh strawberries
- A colander or a strainer
- Cold water
- A clean, lint-free towel or paper towels
Step 2: Prepare the Water
Fill a clean sink or a large bowl with cold water. Make sure the container is large enough to accommodate all the strawberries comfortably.
Step 3: Rinse the Strawberries
Place the strawberries in the colander or strainer and lower them into the water. Gently swish them around for about 20-30 seconds, ensuring that each strawberry is thoroughly rinsed. This helps remove any dirt, pesticides, or residues.
Step 4: Inspect and Remove
While rinsing, inspect each strawberry carefully. Look for any damaged or moldy parts, and remove them with a clean knife or your fingers. Discard any strawberries that appear spoiled or overripe.
Step 5: Final Rinse
After inspecting and removing any damaged strawberries, give them a final rinse under cold running water. This helps ensure that all traces of dirt or contaminants are washed away.
Step 6: Drying the Strawberries
Once the strawberries are thoroughly rinsed, gently pat them dry with a clean, lint-free towel or paper towels. Avoid rubbing them vigorously to prevent bruising.
Step 7: Storage
After cleaning and drying, it’s essential to store your strawberries properly to maintain their freshness. Remove any excess moisture by laying them out on a clean towel for a few minutes. Then, transfer them to a clean, airtight container lined with a paper towel to absorb any remaining moisture. Store the container in the refrigerator.
By following these simple steps, you can ensure that your strawberries are clean and ready to eat. Remember to clean them just before consumption to maintain their quality and flavor.
Why It’s Important to Clean Strawberries
Strawberries are undoubtedly a delightful and delectable fruit enjoyed by many. Their vibrant red color, juicy texture, and sweet flavor make them a popular choice for snacks, desserts, and various culinary creations. However, beyond their appealing characteristics, it is crucial to understand the importance of cleaning strawberries thoroughly before consuming them. Let’s explore why it’s essential to clean strawberries and how it contributes to your overall well-being.
1. Removal of Dirt and Debris
One of the primary reasons for cleaning strawberries is to eliminate any dirt, dust, or debris that may have accumulated on their surface. Strawberries are grown close to the ground, making them susceptible to coming into contact with soil, insects, and other external contaminants. Cleaning the strawberries ensures that any unwanted particles are removed, leaving you with a fresh and clean fruit to enjoy.
2. Elimination of Pesticides and Residues
In the process of growing strawberries, farmers often use pesticides to protect the crops from pests and diseases. While these pesticides are intended to safeguard the plants, they can leave behind residues on the strawberries’ surface. By cleaning the strawberries, you can significantly reduce the presence of these residues, minimizing your exposure to potentially harmful chemicals.
3. Reduction of Bacteria and Microorganisms
Like any fresh produce, strawberries can harbor bacteria and microorganisms that may pose health risks if consumed. These microorganisms can come from various sources, such as soil, water, or handling during harvesting and transportation. Cleaning the strawberries with water helps wash away these bacteria, ensuring that you can enjoy the fruit with reduced chances of foodborne illnesses.
4. Preservation of Freshness and Flavor
Properly cleaning strawberries also plays a role in preserving their freshness and flavor. When dirt, debris, and bacteria accumulate on the fruit’s surface, they can contribute to spoilage and deterioration. By removing these contaminants, you extend the shelf life of the strawberries, allowing them to remain fresh and flavorful for a longer period.
Conclusion
Cleaning strawberries is a crucial step in enjoying these delightful fruits. By following the step-by-step guide outlined above, you can ensure that your strawberries are free from dirt, pesticides, and harmful bacteria. Remember to inspect and remove any damaged parts before giving them a final rinse. Properly dried and stored strawberries will remain fresh and delicious for a longer duration. Enjoy the goodness of clean strawberries and indulge in their sweet, tangy flavors!
Latest Post

Are you ready to take your appetizers to a whole new level? Look no further than this delectable Bloomin’ Onion Sauce recipe. With its rich and tangy flavors, it’s the perfect accompaniment to your favorite fried onion blossom. Get ready to tantalize your taste buds and impress your guests with this easy-to-make sauce.
The Irresistible Allure of a Bloomin’ Onion
Before we delve into the exquisite sauce, let’s take a moment to appreciate the culinary wonder that is the Bloomin’ Onion. This beloved appetizer features a colossal onion, cut to resemble a flower, and deep-fried to perfection. The crispy and golden exterior gives way to tender and flavorful petals, creating a delightful eating experience.
Unveiling the Secret Sauce
No Bloomin’ Onion is complete without a sensational dipping sauce that complements its crunchy goodness. The recipe we’re about to unveil strikes the perfect balance between creamy, tangy, and mildly spicy flavors. Let’s jump right in!
Ingredients:
- 1 cup mayonnaise
- 2 tablespoons ketchup
- 1 tablespoon horseradish sauce
- 1 tablespoon Worcestershire sauce
- 1 teaspoon paprika
- 1 teaspoon garlic powder
- ½ teaspoon cayenne pepper (adjust to taste)
- Salt and black pepper to taste
Instructions:
- In a mixing bowl, combine the mayonnaise, ketchup, horseradish sauce, Worcestershire sauce, paprika, garlic powder, cayenne pepper, salt, and black pepper. Stir well until all the ingredients are fully incorporated.
- Taste the sauce and adjust the seasoning according to your preference. If you desire a spicier kick, add a touch more cayenne pepper. For a milder flavor, reduce the amount of cayenne.
- Cover the bowl with plastic wrap and refrigerate for at least 30 minutes. This resting time allows the flavors to meld together, resulting in an even more delightful taste.
- Once chilled, give the sauce a good stir before serving. Pour it into a dipping bowl, and garnish with a sprinkle of paprika or a fresh parsley leaf for a touch of elegance.
Elevate Your Culinary Experience
Now that your Bloomin’ Onion Sauce is ready, it’s time to take your appetizers to new heights. Serve this irresistible sauce alongside a freshly fried Bloomin’ Onion and watch as your guests’ eyes widen with anticipation. The creamy texture, combined with the zesty undertones, perfectly complements the crunchy exterior and savory onion flavors.
You can also explore various other applications for this versatile sauce. It pairs exceptionally well with other fried delicacies like chicken tenders, onion rings, or even sweet potato fries. The possibilities are endless, and your taste buds are in for a treat!
Conclusion
Indulge in the tantalizing combination of flavors with this Bloomin’ Onion Sauce recipe. Its creamy and zesty profile is the perfect accompaniment to elevate your favorite appetizers. Impress your guests at parties, gatherings, or even during a cozy night in. Whether you’re a seasoned chef or a cooking enthusiast, this sauce will add a burst of flavor to your culinary creations. Try it today and experience the magic firsthand!
Latest Post
- Orange Duck Sauce Recipe: A Tangy Twist for Your Taste Buds
- Irresistible Homemade Strawberry Sauce Recipe for Delightful Desserts
- Master the Art of Making Homemade Soy Sauce
- Perfect Tzatziki Sauce Recipe for Refreshing Greek Delights
- Delicious and Easy BBQ Sauce Recipe: Perfect for All Your Grilling Needs

Palpita Lyrics |Camilo x Diljit Dosanjh

ASHK Lyrics |Yo Yo Honey Singh

Kaavaalaa Lyrics |JAILER |Superstar Rajinikanth


- Actress3 years ago
Akshara Singh – Biography, Movies, Images, Lifestyle

 Business2 years ago
Top Petrol Pumps Brands of India
 Editors' Pick2 years ago
Only Murders in the Building Season 3 Will Star Paul Rudd
 Celeb2 years ago
Leon Vitali, Actor, Dies aged 74
 Celeb2 years ago
Ryan Gosling in talks for ‘Ocean’s Eleven’ reboot with Margot Robbie
- English Song Lyrics2 years ago
Route Of Evil Lyrics | JID
- Latest Punjabi Song3 years ago
Kale Je Libas Lyrics [English + Hindi ] – Kaka Ft Ginni Kapoor
- Biography3 years ago
Shalini Talwar – Wife of Honey Singh – Biography, Images and Instagram


